⚡ New from StreamSpell: Deck Smith — AI-powered Stream Deck Profile Builder. Type one prompt, get a download-ready profile for any device. Try it free →
Reactive Overlays behave just like any regular scene source in Streamlabs, which means you can customize them however you like using filters! Whether you want to shift colors, adjust brightness, or create a completely new look, it only takes a few clicks.
Here's how to do it:
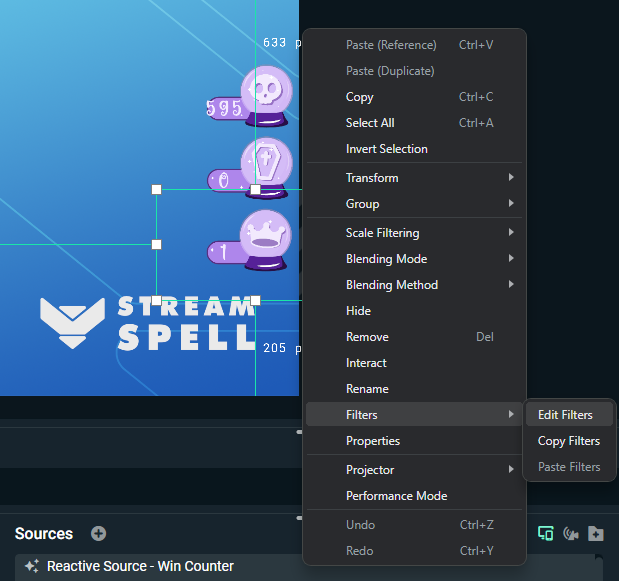
1. Right-click your Reactive Overlay source.
Open Streamlabs Desktop, right-click the source you want to edit, and choose “Filters.”
2. Add a new filter.
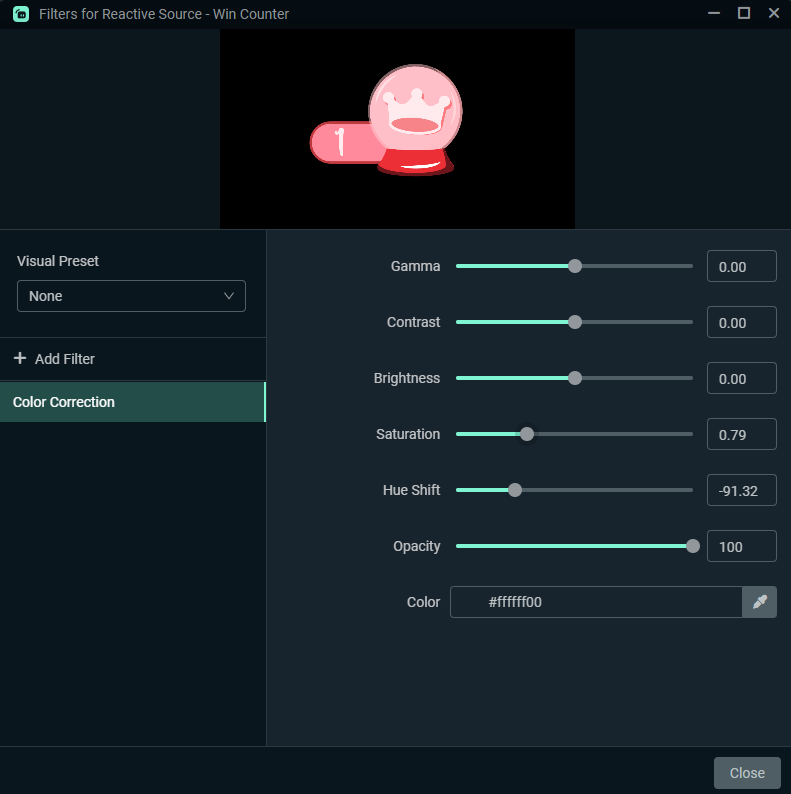
In the Filters window, click “+ Add Filter.” Then choose “Color Correction” from the dropdown list and click “Add.”
3. Adjust your colors.
Use the Hue Shift, Saturation, and Brightness sliders to change the look of your overlay.
Experiment with different combinations to match your stream's theme — for example, we turned Enchanted Night's Reactive Win Counter Overlay into a glowing red crystal ball! 🔮
4. Copy your color settings.
Once you've created the perfect look, right-click the source again, go to Filters, and select “Copy Filters.”
Then, right-click any other source, choose Filters, and click “Paste Filters.”
And that's it! Your color customization now applies instantly to other overlays, widgets, or even your webcam source.
💡 Pro Tip:
You can use this method to color-match your entire stream setup, whether it's for a special event, a game-themed look, or just to switch up your usual vibe.
Check out our full guide to next-gen AI-powered overlays: Next-Gen Reactive Stream Overlays for Twitch & YouTube | Powered by Streamlabs AI
Or browse the complete Reactive Overlays Collection in our store: StreamSpell Reactive Overlays
Find more animated stream overlays, animated stream alerts, animated transitions, Stream Deck Icons, emotes and badges, stream widgets (Chat Box, Event List, Goal Bar), and custom stream designs:
Thank you for following our blog!
See you in the next post 💙
StreamSpell also just launched Deck Smith — an AI-powered Stream Deck Profile Builder. Just type a prompt and get a complete, download-ready Stream Deck profile adapted for any device.
Learn everything about OBS Studio, Streamlabs Desktop, which streaming platforms are best, sizing guides for Twitch, YouTube and more!

© 2025 │ StreamSpell is a premium graphic, video and animation design agency for streamers and gamers. We offer free and premium stream overlays, templates, OBS scene collections, packages, alerts, widgets such as chat box, event list and goal bars, stream panels, webcam overlays, and more assets for Twitch, Kick, Youtube, Trovo and Facebook Gaming.